
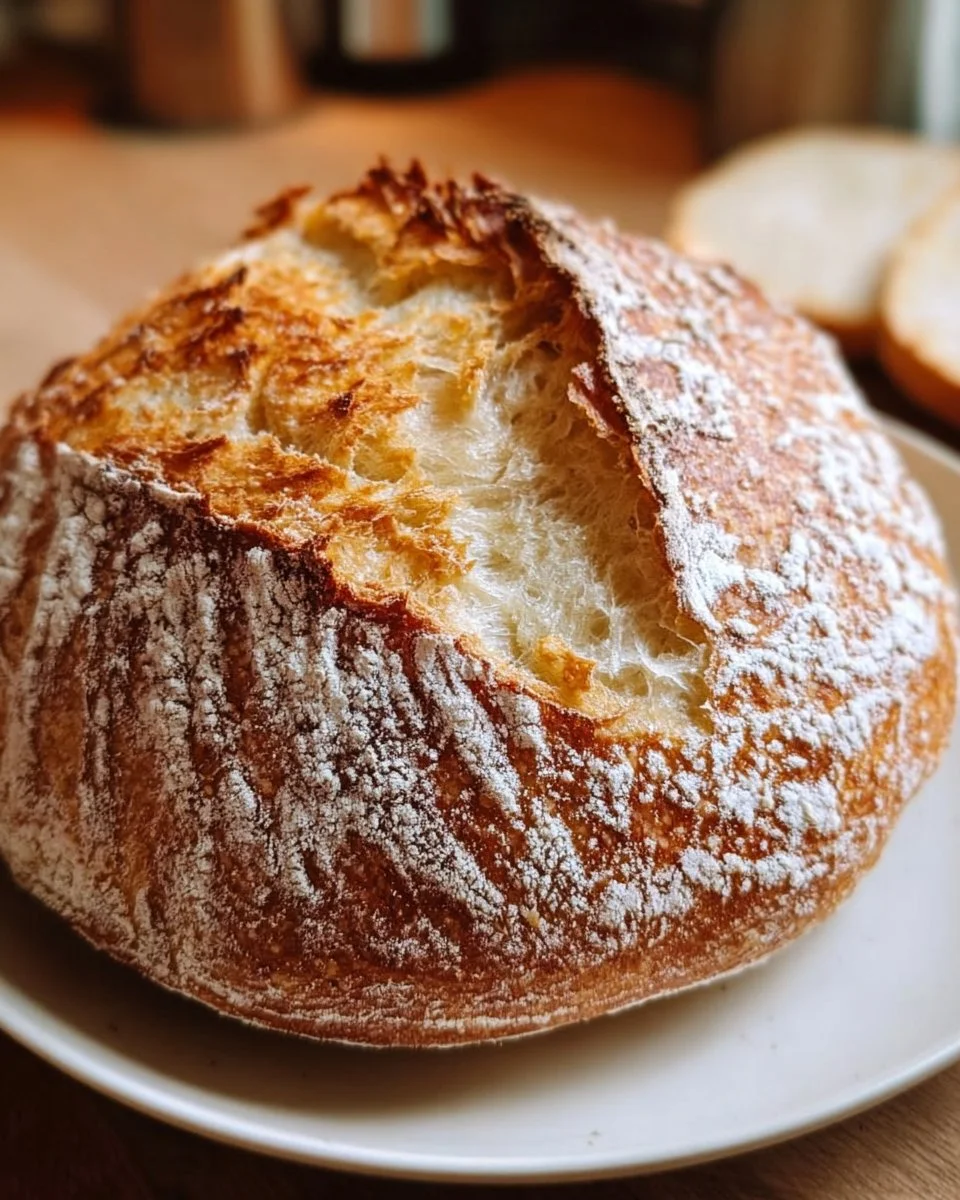
The kitchen fills with the intoxicating aroma of freshly baked bread, the warm scent of yeast and wheat curling around you like a comforting hug. Imagine pulling a golden-brown loaf from the oven, its crust crisp and crackling, releasing an inviting steam that dances in the air, effortlessly whetting your appetite. The moment you slice through that outer layer, the soft, creamy interior reveals itself, inviting you to indulge in a heavenly bite that balances satisfying crunch with moist, airy tenderness. This is the experience of Lazy Baker’s No-Bulk-Fermentation Sourdough Bread, a recipe that embraces simplicity without sacrificing the rich flavors and textures that sourdough aficionadas adore.
Whether you’re a novice baker or a seasoned pro looking for a more accessible approach to sourdough, this recipe speaks to the heart of what makes baking at home so rewarding. It allows you to savor the fruits of your labor with minimal fuss, granting you the freedom to enjoy delicious, artisan-style bread whenever the craving strikes. Each bite bursts with the tangy essence of sourdough, while your kitchen transforms into a cozy bakery, a haven of warmth and delight.
Why You’ll Love This Lazy Baker’s No-Bulk-Fermentation Sourdough Bread
This recipe stands out for its effortless approach to a traditionally labor-intensive process. No bulk fermentation means less waiting time, which translates into a quicker enjoyment of your home-baked masterpiece. This bread is perfect for any occasion—breakfast, lunch, or dinner. Its golden crust and chewy, tangy interior make it a show-stopping centerpiece for family gatherings or a simple, comforting snack paired with your favorite cheese or jam.
Imagine tearing into a slice still warm from the oven, butter melting into its creamy texture while the crust adds a satisfying crunch. Each loaf you make becomes a testament to your culinary journey, allowing you to share delicious moments with your loved ones. Lazy Baker’s No-Bulk-Fermentation Sourdough Bread not only nourishes your body but also warms your soul, reminding you that the joys of baking needn’t be complicated.
Preparation Phase & Tools to Use
To embark on this joyful baking adventure, gather a few essential tools that will enhance your experience:
- Large Mixing Bowl: A spacious bowl allows for easy mixing and gives your dough room to grow.
- Dough Scraper: This handy tool helps you manage the sticky dough and transfer it without a mess.
- Dutch Oven: This cooking vessel creates a mini-oven effect, capturing steam and ensuring a perfectly crisp crust.
- Kitchen Scale: Weighing ingredients ensures precision, yielding consistent and delightful results every time.
Preparation Tips:
- Ensure your sourdough starter is active and bubbly; this key ingredient kick-starts the fermentation process, infusing your loaf with that signature tanginess.
- Warm your water to about body temperature; this promotes yeast activity without shocking it.
Ingredients for Lazy Baker’s No-Bulk-Fermentation Sourdough Bread
- 500g Bread Flour: This flour gives the loaf its structure and chews; however, you can substitute it with all-purpose flour if necessary.
- 350g Water: Use filtered water for the best flavor; adjust slightly based on your dough’s feel.
- 100g Sourdough Starter (active): A healthy, bubbly starter is essential for achieving that wonderful flavor and rise.
- 10g Salt: This enhances all the flavors and strengthens the dough, creating that all-important crust.
How to Make Lazy Baker’s No-Bulk-Fermentation Sourdough Bread
- In a large bowl, combine the bread flour and water with your sourdough starter, mixing until you no longer see any dry flour. Expect a shaggy, messy mixture.
- Let this mixture rest for 30 minutes. This process helps the flour absorb the water and begins gluten development.
- Carefully add the salt to the dough and mix it in by squeezing the dough with your hands until fully incorporated. The dough should feel more cohesive.
- Cover the bowl with a damp cloth and let the dough rise at room temperature for 4-6 hours, or until it has roughly doubled in size. This is where the magic happens!
- Preheat your oven to 450°F (230°C), placing your Dutch oven inside to heat up. The hot Dutch oven will create the ideal baking environment.
- After the dough has risen, transfer it to a floured surface. Gently shape it into a round loaf, taking care to maintain the air bubbles within the dough.
- Let the shaped loaf rest while your oven continues to preheat. This gives it a final boost of lift.
- Once hot, carefully remove the Dutch oven, place the dough inside, cover it with the lid, and bake for 30 minutes. The steam trapped inside will work wonders on the crust.
- Remove the lid and bake for an additional 15 minutes until the crust turns a deep golden brown and the aroma fills your kitchen.
- Let the bread cool on a wire rack for at least 30 minutes before slicing. This waiting period allows the interior to set perfectly.
Chef’s Notes & Helpful Tips
To ensure success, embrace these make-ahead tips:
- You can prepare the dough in the evening and let it rise overnight in the fridge, which not only develops flavor but also makes morning baking a breeze.
- If you want to mix things up, try adding herbs, cheeses, or spices to personalize your bread.
Cooking alternatives:
- You can experiment with baking in an air fryer. Adjust the temperature and time for a perfectly baked loaf that’s sure to impress!
Common Mistakes to Avoid
- Skipping the salt: Salt isn’t just for flavor; it strengthens gluten structure and controls fermentation. Always add it!
- Under- or over-proofing: Know your dough. Under-proofed dough won’t rise as much, and over-proofed dough will collapse. Keep an eye on its volume.
- Insufficient cooling time: Cutting into the bread too soon can lead to a gummy interior. Patience is key after baking.
What to Serve With Lazy Baker’s No-Bulk-Fermentation Sourdough Bread
- Creamy Avocado Toast: Spread ripe avocado on a warm slice and season with salt and pepper for a simple yet delicious treat.
- Classic Grilled Cheese: Melt gooey cheese between two slices of your sourdough for a nostalgic flavor explosion.
- Homemade Jam: Slather your warm bread with your favorite fruit preserves; the combo of sweet and tangy is irresistible.
- Olive Oil Dipping Sauce: Finish with a drizzle of high-quality olive oil and a sprinkle of balsamic vinegar for an Italian flair.
- Charcuterie Board: Use the bread as a base for cured meats and cheeses, complementing the rich flavors with the sourdough’s tang.
- Soups and Stews: A slice of this hearty bread pairs beautifully with a warm bowl of soup, perfect for soaking up the savory broth.
- Eggs Any Style: Top it with poached or fried eggs for a hearty breakfast that’s both comforting and filling.
Storage & Reheating Instructions
To keep your bread fresh, wrap it in a clean kitchen towel and store it in a cool, dry place. If you anticipate not finishing the loaf within a few days, slice it and freeze the pieces. For reheating, simply pop a slice in the toaster or warm it briefly in the oven until toasty and revive its delightful crunch.
Estimated Nutrition Information
Approximate values per slice (based on a standard serving size of ten slices):
- Calories: 150
- Total Fat: 0.5g
- Carbohydrates: 32g
- Protein: 4g
(Disclaimer: Nutritional values may vary based on specific ingredients and preparation.)
FAQs
1. Can I use whole wheat flour instead of bread flour?
Absolutely! Whole wheat flour adds a delightful nutty flavor and extra nutrients. However, consider adjusting the water slightly, as whole wheat tends to absorb more moisture.
2. How can I tell if my sourdough starter is active?
An active starter should double in size within a few hours after you feed it and possess a bubbly, airy texture and a pleasant, slightly tangy smell.
3. What happens if I over-knead the dough?
Though not typically a concern with sourdough due to its gentle handling, overworking can lead to a dense loaf. Always aim for a gentle touch, encouraging the dough to retain air.
4. Can I add mix-ins like nuts or seeds?
Yes! Feel free to fold in nuts, seeds, or even herbs during the shaping phase. They add flavor and texture, just be mindful of not adding too much, as it can affect the dough’s rise.
5. How long does it take for the dough to rise in cold weather?
In cooler temperatures, expect longer rise times. If the dough isn’t rising fast enough, try placing it in a warm spot — like near a heater or in an oven warmed to its lowest setting and then turned off.
Conclusion
Embrace the art of bread-making with Lazy Baker’s No-Bulk-Fermentation Sourdough Bread, a recipe that invites everyone into the warm embrace of home baking. With its minimal fuss and exceptional flavor, this sourdough will elevate your culinary repertoire and create cherished moments around the table. So roll up your sleeves, savor the process, and prepare for the delight that awaits in each slice of golden-brown goodness. Happy baking!
Print
Lazy Baker’s No-Bulk-Fermentation Sourdough Bread
- Prep Time: 15 minutes
- Cook Time: 45 minutes
- Total Time: 60 minutes
- Yield: 10 slices 1x
- Category: Bread
- Method: Baking
- Cuisine: American
- Diet: Vegetarian
Description
A simple and delicious sourdough bread recipe that eliminates the bulk fermentation step for easier home baking.
Ingredients
- 500g Bread Flour
- 350g Water
- 100g Sourdough Starter (active)
- 10g Salt
Instructions
- Combine the bread flour and water with your sourdough starter until there’s no dry flour.
- Let the mixture rest for 30 minutes.
- Add the salt and mix in by squeezing the dough until incorporated.
- Cover the bowl with a damp cloth and let the dough rise for 4-6 hours.
- Preheat your oven to 450°F (230°C) with the Dutch oven inside.
- Transfer the dough to a floured surface and shape it into a round loaf.
- Let the shaped loaf rest while the oven preheats.
- Carefully remove the Dutch oven, place the dough inside, cover it with the lid, and bake for 30 minutes.
- Remove the lid and bake for an additional 15 minutes until golden brown.
- Cool the bread on a wire rack for at least 30 minutes before slicing.
Notes
For best results, ensure your sourdough starter is active and bubbly.
Nutrition
- Serving Size: 1 slice
- Calories: 150
- Sugar: 0g
- Sodium: 10mg
- Fat: 0.5g
- Saturated Fat: 0g
- Unsaturated Fat: 0g
- Trans Fat: 0g
- Carbohydrates: 32g
- Fiber: 1g
- Protein: 4g
- Cholesterol: 0mg